Steam Locomotive Ultra-Detailing in “O” Scale…N&W K1 #107
HERE WE GO AGAIN!!!
A commission was received from a well know publisher and modeler. Here’s a teaser…

The Client had originally contracted with a self described “1/4″ custom builder” out of New Jersey to take an old Toby USRA Heavy Mountain, and completely rebuild it into an accurate representation of a Norfolk and Western Class K1, 4-8-2.
The client paid good money for the original work, but the final product from the Jersey builder was, for lack of a better term…ABYSMAL. I could NEVER, in good conscience, turn out a product that poor (that had my name on it), and THEN stoop so low as to expect payment for something so inferior.
Here are a few images of the locomotive when I first received it from the client. This is also the way the Client received the loco from the original builder…YIKES!
(click on any of the thumbnails and click again after they open for a full sized view)


When I first agreed to take on this project loco, the Client had wanted me to strip it, “tune it up” by reworking some of the most glaring issues, and then repaint it and install DCC w/sound. After a thorough going over, I let the Client know that the list of errors and issues literally ran well into the hundreds, and the only way (IMHO) to make this loco “right” was to completely “kit” it, back into its original, individual components and start over. That included torching apart the boiler.
N&W K1 drawing, Model Railroader, February, 1963
 (image courtesy Kalmbach Publishing Co.)
The first step in the process was to strip the paint and blast the loco clean. The second was to take the torch and do a total disassembly, removing every last component.
After it was taken apart, the boiler courses were all individually re-rolled (to the correct diameter) and reassembled, including the firebox, and a new backhead was created. The unique N&W domes, which were originally lost wax cast for the project the first time around, were not even close to anything that was on the Roanoke Shop’s prints (they were too large), so they were totally reworked and carefully massaged to match the actual N&W specs. The boiler, firebox, boiler bands, cab front bulkhead, and domes were then re-assembled into a straight, credible copy of an N&W K1 boiler. Here’s a shot of it after assy.

Here’s a closeup of the sand dome being reworked….

Once the basic boiler was completed, I turned my attention to the cab. The one supplied was a facsimile of an N&W sports cab, but it had several errors. Here’s the rebuilt, corrected cab, including accurate, custom made, half- round rain gutters and angled toe boards. NOW she’s N&W!

At this point I needed to rework the cylinders and fit the rebuilt boiler to the frame, and the cab to the boiler. Once complete, and happy with the fitment, I started detailing the backhead. Like everything else on this project the original builder detailed it sparsely, and incorrectly. Using info supplied by the N&W Historical Society, I did it up based on original images. Here’s the end result.
 008")
Many locos have a firebox-top-mounted turret, that serves as a steam distribution manifold for the loco accessories (injectors, stoker jets, stoker motor, feedwater heater, compressors, etc.). Many larger loco were also equipped with a sheet metal shroud or cover that encloses the turrent and its associated piping. The N&W K1, however, had an open turret, with all piping exposed. Here it is accurately modeled. I have included lables that indicate the routing of each of the lagged steam lines.

The N&W used a perforated running board material on their locos. The ones originally “attempted” by the first builder were warped (excessive heat) and poorly executed, so they were removed and thrown away. These were made and carefully fitted using similar material from Special Shapes.
http://www.specialshapes.com/index.html

Once the running boards were installed, all the appliances could be hung, including the power reverse, Westinghouse dual compressors, compressor suction filters, Worthington BL4b Feedwater Heater, and associated tanks and piping.
The air tanks originally supplied were not correct. They were too long and had plain, convex ends, rather than the appropriate inset, convex ends. I turned new ends for all tanks, cut off the existing ones (shortening them in the process), and applied the new ends. Here’s a shot of before and after.

The large, pilot mounted air tank was a wreck, and was tossed. Here’s a new, scratchbuilt replacement with correct lower mounts and piping, along with a new pilot deck and reworked pilot.

Here’s the installed BL4b and piping…

Here’s the new stoker, supply piping and control rods.

The tender needed some attention as well. The original cistern deck was all dented with the seams broken lose from the sides. The original builder has installed a large weight in the tender that came lose when it was shipped to the client. The weight, bouncing around while in transit, trashed the deck. I made and installed a new deck, and soldered shut all the opening doors, hatches, and what have you.
There’s NO BETTER WAY to trash a great paint job than with locomotive parts swinging open and closed.

Completely rebuilt, scratchbuilt smokebox front, with individual NBW castings, and hand-cut numerals from 0.005 brass sheet.

Two views of the completely detailed boiler…
(Engineer’s side)
 001")
(Fireman’s Side)
 007")
Finshed tender…

Many of the N&W K1 Class used second-hand tenders, purchased from the NKP. This one was originally from a US Hobbies NPK Berk. The deck, coal boards, bulkheads, collars, ladders, grabs and other details have been extensively tweeked per the prototype, as well as the addition of a doghouse.
All superstructure sheetmetal is ready for paint. Here’s a shot of the parts, just out of the paint oven.

Once the boiler and tender were fully detailed and painted, it was time to turn my attention to the chassis.
WHAT A NIGHTMARE!!!
The last builder performed some soldering on the boiler with it installed on the chassis, with the drivers still in the frame. He dribbled flux on the driver tires (and didn’t clean it off), which left them corroded and deeply pitted. The ONLY way to remove the damage was to turn the tires. They were 0.172 wide from Toby, so I turned them to 0.145 (the current NMRA spec.), resurfaced the treads, and centerdrilled the axle ends, for a prototypical appearance.

Like many older locos, the main rod, side rods and pins were worn and sloppy. All rods were bushed and new steel pins were made as replacements. The original crosshead guides were made of brass, and looked poor. A new, step-cut set was made out of 12L14 steel, that were then polished and installed. Once I had the assembled mechanism rolling soothly, I applied the reworked valve gear, upgraded all fasteners to micro hex-heads, installed the gearbox and a Maxon high efficiency can motor. Here’s an image of the completed, painted assy. being tested.

With all parts fully in paint, it’s time to apply decals, a clear overcoat, and do a final assembly.
3/4 Fireman’s Side/Front

K1 #107 on a wreck train…
 (image courtesy N&W Railway Historical Society)
Rear View, Fireman’s side…

Left, rear cab…

Left, rear tender…

Engine-to-tender connections…Fireman

Engine-to-tender connections…Engineer

Cab of 107…
 (image courtesy N&W Railway Historical Society)
Fireman front…

K1 #107 front end…
 (image courtesy N&W Railway Historical Society)
Engineer front…

Cab roof and coal load…

Overhead, entire loco…

Fully detailed backhead…

Topside details…one more time

The Loco arrived the Client’s house, and he was very pleased with the results. Here’s an email he sent me, not long after unpacking it:
Re: Inspection Report…
Matt, I put the new K1 on the layout to get some photos and just generally look it over. It is spectacular!!! Everything worked fine and it runs very smoothly when it’s not on my dirty track ;-). I wish the MRC decoder I selected had a Rule 17 lighting feature. I don’t like it when the headlight goes out in reverse.
So, I am 110% pleased. It exceeds all of my expectations. I thank you! Have a Happy Thanksgiving. I will with my new toy.
Best regards
Joe
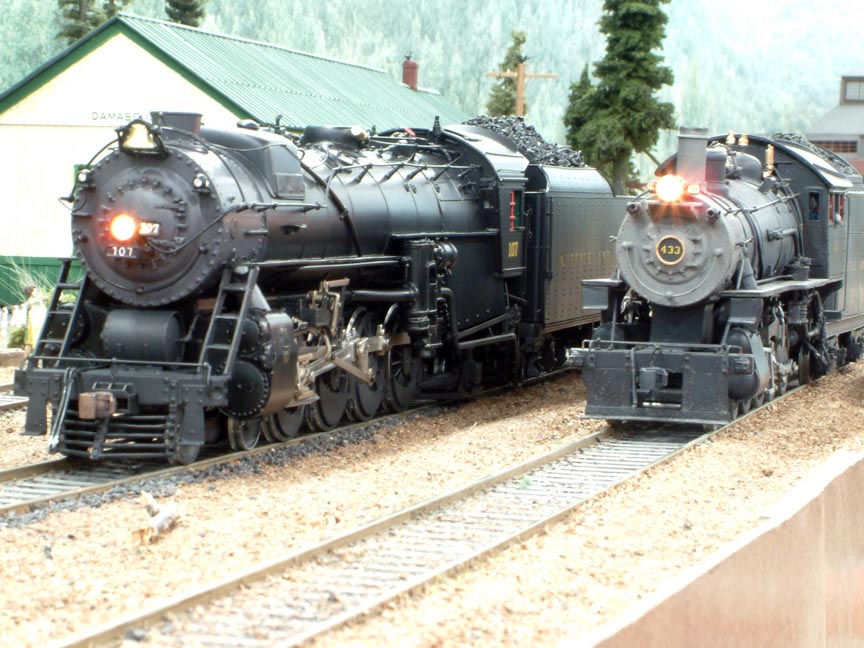
After he gave it a thorough inspection, he posed the loco for some photography. Here are shots he shared with me.
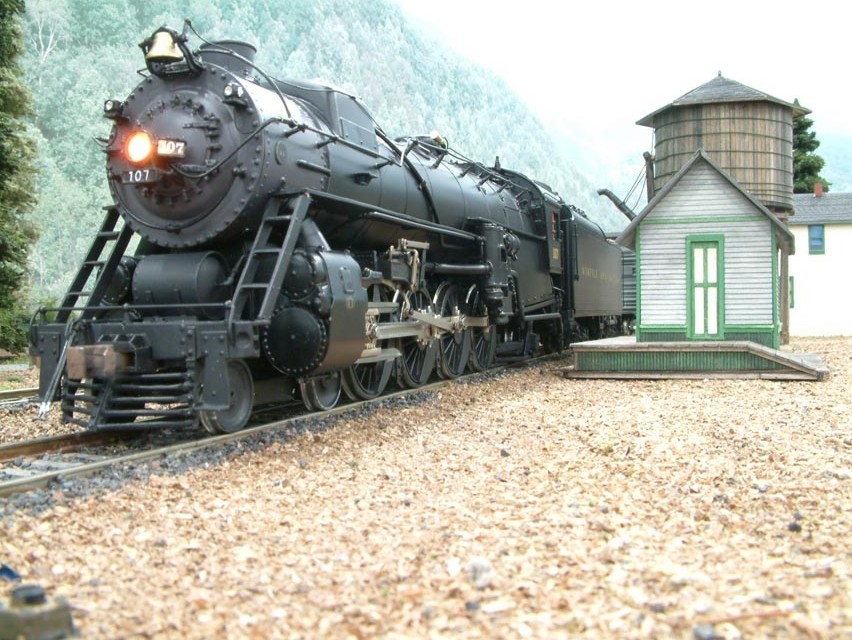
#107 makes her debut @ Damascus, VA.
K1 takes water at the tank…